Setting up a new Lab Management System: A Quick Guide
The decisions that matter before you start logging data
When you sign up to a new piece of software, it’s tempting to get stuck in immediately; start clicking buttons, logging samples, seeing just what it can do. But the truth you never hear in a sales pitch is that when it comes to an electronic lab notebook (ELN) or laboratory information management system (LIMS), no matter how intuitive it is, that may just be a shortcut to frustration.
That’s because, as usual, there’s truth behind the idiom “less haste, more speed”. In this case, take the time to think through exactly how your offline lab works first; who does what, how you describe your samples, how, when and where you typically collaborate, what the handover points are, and where things are stored. This will help you match your “digital lab” as closely as possible to your real-life set up, so that when they log in to the platform for the first time, it instinctively makes sense to the scientists who will be using it daily.
Lab Thread is built around exactly this idea: the closer your lab management platform mirrors how your lab already runs, the less it gets in your way. Here's our guide to where to start.
Who does what?
The first step is to consider what each person does in the lab, and what level of permissions they therefore need within Lab Thread.
Lab Thread's permission model is built around a small set of positions, each carrying a different level of access. An Owner has full control of the account: billing, user management, and all the system settings. A Manager can create projects, invite collaborators, and generally manage team activity, but can’t change the system settings. A Scientist can access everything they need for day-to-day work: logging experiments, tracking samples, and creating and manipulating designs within the molecular biology tool.
The useful part is that these roles aren't mutually exclusive, and an account isn't limited to a single Owner either. It's tempting to make the most senior person in the lab the Owner by default, but that's not always the right choice: a PI who is also the Owner rarely has the time, or the appetite, to configure design types, review permissions, or keep templates up to date, while the person who'd actually do that work, perhaps a lab manager or senior scientist, doesn't have the access to make the changes they can see are needed.
The fix is usually to make both of them Owners, and split the responsibility: the PI keeps billing and final sign-off, the lab manager takes on the day-to-day upkeep as the lab grows. A lab manager who also runs their own experiments can hold Scientist and / or Manager access alongside Owner too, so taking on that responsibility doesn't mean losing their own project or bench-level view.
The most important decision, and the one to make first, is therefore "who actually has the time and context to set the account up properly and maintain it accurately?" Then make sure that person has the access they need to do so. Getting this right from the start avoids the most common cause of frustration: the account technically has an owner, but not one with the time to actually keep it in shape.
How does your lab work?
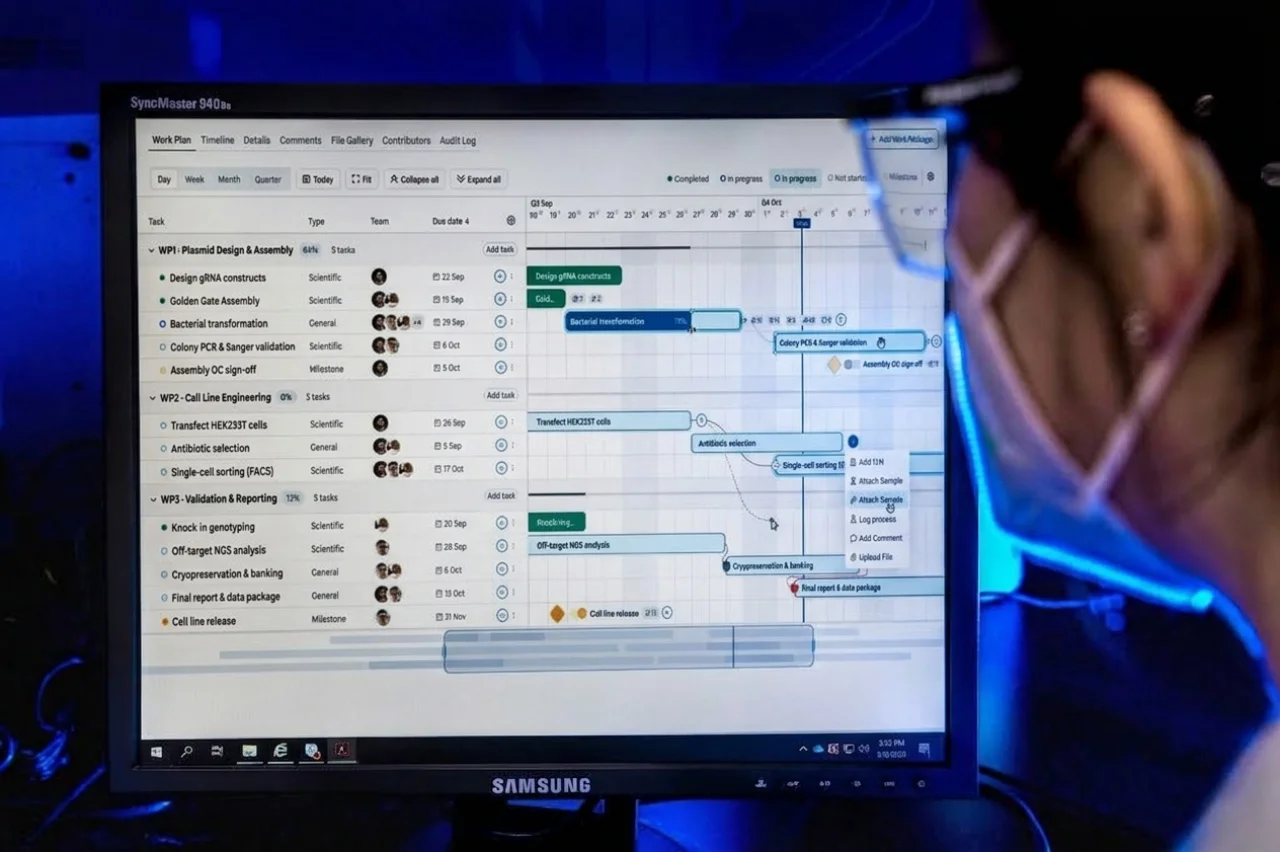
Before setting up a project in Lab Thread, consider the more basic question first: how does your lab define a project, a work package, and a task? These aren't fixed terms with one correct meaning, and the answer looks completely different depending on how your lab runs.
In a core facility or CRO, the project is often the requesting lab or client, with work packages split by job number or by sample, and tasks representing the actual work against each one. Some facilities structure it the other way round instead: each project is an assay type, and each work package is a client or sample within it. In an academic lab, a project is more often a specific PhD student's or postdoc's body of work, with work packages built around what's needed for each figure of the eventual paper or thesis, or simply split by experiment. Lab Thread can accommodate any of these, but it will only feel natural if you've matched it to how your lab already thinks, rather than trying to bend your lab's habits to fit a generic structure.
This same thinking carries into your ELN. Some labs need just one kind of record: a traditional, diarised entry per experiment. Others need more than one: a top sheet of key results for a project, with detailed records sitting underneath it, or a separate record per sample rather than per experiment. You'll also need to decide how you want to handle repeats: a new record each time, or a new section added to the one before, so the full run of an experiment stays together in one document. Whole document templates, dated and timestamped sections and section templates, and linked records make all these approaches possible, so the decision isn't about which structure LabThread supports, but which one matches how your lab already thinks and records its work.
Once you know the shape your records need to take, it’s time to think about how to build them: do you template everything upfront, or build templates as you go? If your lab already has protocols or experimental write ups refined over years, you can import them directly from Microsoft Word into Lab Thread and save them as templates to make sure that none of the all-important “tweaks” get lost by starting again from a generic default. But if you’re building your record for the first time, you might prefer to build templates as you go; recording each experiment and only saving it as a template once you know it's an experiment, and a record structure, you’ll need frequently. Neither approach is better than the other, it's a genuine preference, so pick the one that suits you rather than assuming you have to have it all planned before you begin.
What does your lab work with?
Lab Thread organises what you work with into Design Types,Sub-Types, Designs and Samples; a broad category down to the actual physical vial. For example, for a cell culture lab, the design type might be “cells”,the sub-type “mammalian”, the design “HEK293”. The sample is then the physical vials of these cells in the liquid nitrogen canisters. You can follow the same logic tree to set up all the other sample types you commonly work with, and once you've set that up once, you don’t really need to think about it again. The harder decision, by contrast, is what you record about each sample every time you log it.
For a vial of cells, that might be passage number, the date it was frozen, the cell count and the cryoprotectant used, as well as who froze it (although that, as well as the date, will be recorded automatically within LabThread). For an antibody, it might be lot number, concentration, diluent or storage buffer, host species and clonality. You might also want the validated application and working dilution to be recorded with every sample.
But knowing what to record isn't quite the same question as knowing what you need to see first. Lab Thread lets you add as many fields to a sample as you need, but if everything is one long list you'll spend your time scrolling sideways through columns just to compare two vials. Decide separately which two or three fields should sit in the first columns. This is the information that helps you choose which vial or batch to use right now, not just the data that matters for the record. For cells, that's probably passage number and viability; for antibodies, probably lot number and concentration.Everything else can still be recorded, it just doesn't need to be the first thing you see.
A quick way to think about it: for your two or three most-usedsample types, split your list into two: what needs to be recorded somewhere,and what needs to be visible at-a-glance when you're deciding which sample tograb.
Most labs can list their main materials without much thought,but there are always exceptions: expensive reagents, antibody stocks bought inrather than made in-house, or simply a one-off sample-type for a singleexperiment. The good news is that you don't need to set everything up inadvance. If you're logging a sample and the design doesn't exist yet, you cancreate a new design directly at the point of logging; no need to go back to thesystem settings or to stop and find whoever holds Owner access
Where does everything live?
Before you can log your first sample, you need to have a location set up to log it in. For most labs, this means -80 storage for long-term or unstable stocks, -20 for shorter-term reagents, fridges for working aliquots, and liquid nitrogen for cells. These might be spread across different rooms, and sometimes different floors or buildings. Before you set anything up in Lab Thread, list every place a sample in your lab actually lives, including the room or position in a room each one is in.
Whatever you list, name it in Lab Thread exactly the way your lab already talks about it. If every freezer has a name (Freezer 2, "the big one”, “Jeremy”), use that same name in Lab Thread. If people refer to storage by room and number rather than by name, log the room name and number, not a generic "Freezer" placeholder. The storage map works best when it matches the language your lab already uses so that finding a sample doesn’t require mentally translating between two naming systems every time.
Then think about what to log, and when. A sample's location often isn't fixed over its life: a stock vial might sit in the -80 for months, while the working aliquot you're using stays in the fridge for a week at a time. Decide upfront whether you want to log that working aliquot as its own tracked child sample, linked back to the original parent stock (Lab Thread makes this easy), or just note it informally and rely on the main stock record. Neither answer is wrong, but make the choice on purpose rather than by default.
Once you know your locations and what you're tracking, set up your freezer map down to the exact box, and well. When something's frozen, you can’t always read the label easily, and grabbing the wrong tube means either wasting a precious sample or losing time discovering the mistake later. A digital map that always matches reality, because it's built into how you log samples rather than something someone has to remember to update separately, is exactly how to solve that problem.
You don't have to get everything right first time
Taking the time to think carefully about how your lab works on a daily basis, and how to mirror that as closely as possible within Lab Thread is the smoothest path to rapid adoption and seamless integration into your lab’s daily life. But if it doesn’t go quite to plan? Not a disaster. None of the decisions above are permanent. Design types can be renamed, permissions can be reassigned, a freezer map can be restructured, and a template you built on day one can be easily replaced by something that works better, once you've actually used it a few times. More importantly, if anything about your lab's setup doesn't fit neatly into the decisions we’ve highlighted, we’re at the other end of a quick email. Just get in touch and we’ll be happy to help. We’ve also published a step by step guide to getting started with Lab Thread to accompany this blog post.
Are you ready to un-silo your science?